Connecting BigTime to QuickBooks
If you're a QuickBooks user, then you'll want to link BigTime to your QuickBooks company data file. To connect to QuickBooks for the first time, you'll use the BigTime Monitor (a program that's installed as a part of your BigTime system and that appears in your windows System Tray as a little orange "window" icon). Typically, Monitor starts up automatically when you're finished with the installation.
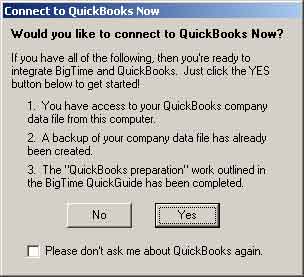
When the Monitor loads up for the first time, it will ask you if you'd like to connect to QuickBooks using a dialog screen similar to the one shown here. Just click YES to start the process.
- BigTime will ask you to login to QuickBooks to get started. You'll need to have the QuickBooks Administrator Login for this initial step. BigTime can be set to login as any user, but the main administrative contact for the QuickBooks data file needs to login first so that they can "approve" BigTime as an integrated application.
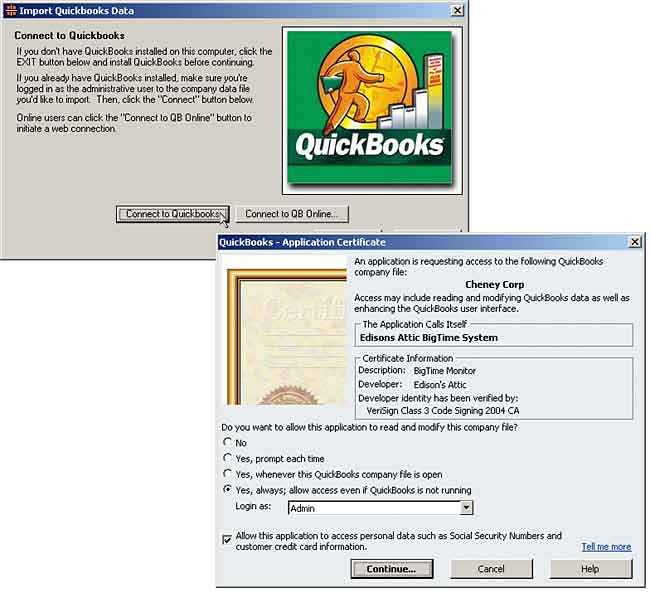
- Click the "Connect to QuickBooks" button on the BigTime Integration dialog. Once you do, BigTime will minimize and attempt to connect to QuickBooks. You'll see a confirmation page similar to the one shown here in QuickBooks. Select "yes always" (and select a user will full access to your QBW file) and "allow application to access personal data"). QuickBooks will ask you to confirm those selections after you click the Continue button.
- QuickBooks Online Users will have a different set of configuration options. You can refer to the on-screen instructions to connect with your QuickBooks online file. You'll need the administrative login in order to grant BigTime access to your online file.
- Import all of your QuickBooks data into BigTime by clicking the Import button. BigTime will step through all of your staff, projects, vendors and items and import them into temporary tables within the system. Then, it will ask you a few basic questions about how you want that data to show up in BigTime. Finally, it will run an initial import into the BigTime tables.
That's all you'll need to do! Your BigTime system is now connected to your QuickBooks company data file and you're ready to login and look around. BigTime is automatically scheduled to review any changes you make to your QuickBooks data file every evening during the nightly sync.
For more information on how you can tweak the information that's shared between QuickBooks and BigTime, you can take a look at the QuickBooks Integration chapter. While a complete list of items you can share between BigTime and QuickBooks isn't appropriate here, some of the highlights include the following:
- exporting time entry data to QuickBooks,
- exporting employee expense reports to QuickBooks,
- creating draft invoices that can be exported to QuickBooks,
- importing vendor expenses from QuickBooks bills, checks and credit card charges to be reviewed/billed in BigTime,
- automatic updates of invoice payment history and inclusion of QuickBooks A/R data on the invoices you print out of BigTime,
- shared common lists (e.g. - project type, customer type, status codes, etc),
- sophisticated QuickBooks class integration in many of BigTime screens, reports and transactions.
Preparing Your QuickBooks Data
Before you actually connect these two systems, you'll want to make sure that you're ready to integrate them. The sections that follow outline some common items that need to be cleaned up in order to optimize the connection and make setup run smoothly.
Keep in mind that you're pointing to a QuickBooks data file from the BigTime Monitor, so your BigTime server needs to be able to see your QuickBooks company data file. Make sure you place that data file into a folder or network share where both you and the BigTime computer can access it. It's also a good idea to create a backup of your data file before connecting it to BigTime.
Preparing Your Staff List
Make sure that the employee list is up to date. Mark as inactive those people who are no longer employed at your firm. In addition, make sure the following items are filled in:
- First Name, Last Name, Address, City and State.
- Phone Numbers (use a consistent format; Phone is your work # and Alt. Ph. is your home #).
- Email Address. Remember that BigTime uses the email address as a user's login, so a missing email address will prevent users from logging in. No two users can have the SAME email address, so make sure all of your email entries are unique!
Preparing Your Customer/Job List
- Mark old customers and jobs as inactive. BigTime will ignore inactive customers and jobs, so marking jobs as inactive before you link to BigTime simplifies the import process.
- Edit your customer/job names so that they will make sense to your staff as they attempt to enter time/expenses. BigTime uses your QuickBooks "full name" for each of the jobs you have defined. To see a list of your full names, open up your customer/job list in QuickBooks and choose the "flat view."
- Fill in Account Numbers as required. BigTime pulls job numbers from the Payment Info tab (on the job information screen). We use the data in your Account Number field, so you should make sure that your job numbers are entered correctly in that field.
- Make sure that the name and billing address fields are completed, and make sure that this data is consistent from project to project. BigTime will expect to see every project's address follow the same format (eg. - CompanyName, Contact, Address). BigTime is only permitted access to the first 4 lines of your address, so make sure that no address uses more than 4 lines of information (BigTime assumes that the first address line is the same as your Company Name field, so we ignore it when we run your initial import).
- Fill out the contact name correctly. That's where we pull your primary contact information from, so BigTime prefers to see the first/last name fields filled out. Lastly, the Customer and Company Name fields should be filled in correctly.
Other Information