![]()
![]()
![]()
|
|
|
|
|
See Also |
Mileage is a special type of expense in BigTime called a "unit" expense. Instead of entering a dollar amount for mileage, users will just enter a number of miles, and the system will calculate the total dollar amount for those miles based on the reimbursement rate the system administrator has defined.
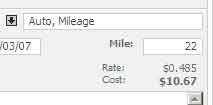
When a user selects the Mileage category from their pick list of expense categories, the entry pane will show a "miles" field in addition to a "rate" and "cost" field. The user fills in the "miles," and the system will calculate cost automatically.
Expense Cost Rounding. Even though you can enter a cost rate that has up to 5 digits, the actual expense is rounded to 2 decimals. 3 miles at $.485, for example, will be rounded to $1.46 (not $1.455). We do that because it has to post into QuickBooks as a valid (2-digit) dollar value.
Each of your per-unit costs has a per-unit price as well as a cost rate. This mileage entry, for example, may have a cost of .485, but a price of .55. That would mean mileage charges will be reimbursed at .485/mile, but will be billed to customers at .55/mile. You can control both rates in the system settings.
The "rate" at which per-unit items like mileage are reimbursed is controlled by the system administrator. They can set that rate in the System Settings... Lists/Lookups... Expense Codes page. Each expense category is listed on that page, and you can click on any one of them to edit the detail attached to that category.
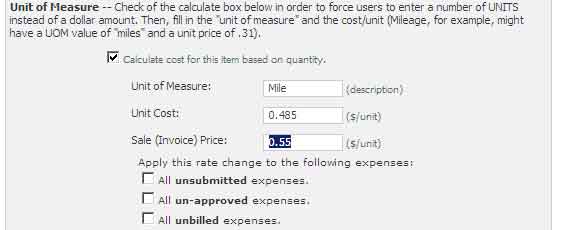
Just check off the "Calculate cost for this item based on quantity" check box at the bottom of the Expense Code Edit page and fill in both the "label" for the units box as well as the per unit cost. If you plan to bill customers for this expense, then enter the per unit price in the space provided as well.
If you update a per-unit cost, the system will ask you if you'd like to re-calculate the reimbursable amounts for any expenses that have already been entered into the system. You can apply that new rate to un-submitted expenses only, to un-approved expenses or to un-billed expenses.
If you'd rather leave the per-unit rate for the user to enter, then you'll need to use a special expense entry format. You can update your expense entry form to "Expense_2RT.htm" in the System Settings... General page. When you do, the "per-unit" entry will look like the format shown here.
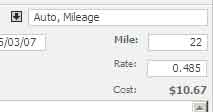
The user will see the default unit rate in the "rate" field, but they will be able to enter whatever currency value they'd like.
There is a section of the QuickBooks Integration chapter dedicated to setting up credit card charge entry, so take a look a that section for more detail on how those types of charges differ from regular employee expenses.
![]()
Once credit card processing is setup, entering credit card charges in the system is simple. Users enter credit card charges just like any other expense in their report. However, users can flag these expenses as corporate card charges so that they are not fed into QuickBooks as a "payable" to the employee.
Users submit credit card expenses as a part of their regular expense report(s). Then, your system administrator can filter out those credit card charges so that they can be linked to the appropriate charge card and imported into your accounting system properly.
If users have recurring expenses, then they can copy them from day to day using the expense grid at the bottom of the page.
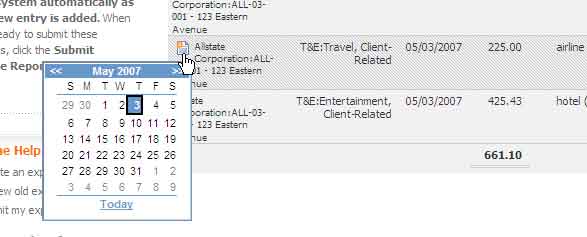
Just click on a row you'd like to duplicate and you'll see a "copy" icon appear. When you click that icon, the system will ask you for a new date to copy the expense into. A duplicate record will be created for the date you select.
BigTime allows users to copy an entire expense report, edit the items, and then re-submit them as new expenses. To do that, just follow these simple steps:
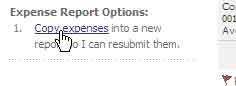
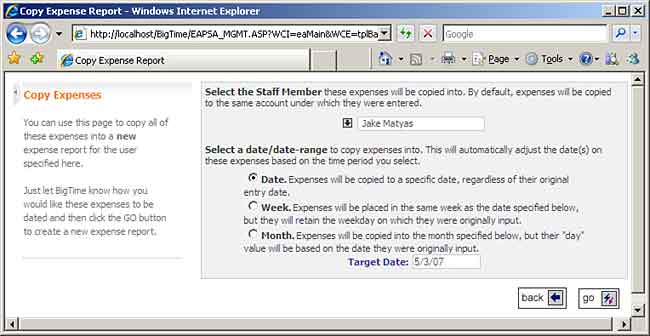
You can copy the items from your report into the "current" month, the "current" week, or the "current" date. Your selection will determine the date that these expenses are connected to when they are copied into the current expense report.
While a typical user can only copy expenses from their own historical expense reports, Administrative users can copy expenses from one user to another. To create a copy of any expense report in the system, just browse to the specific staff member's expense report history and use the same "copy expenses" link we clicked in step #2 above.
Canadian, UK or Australian users will want to select an expense report format that allows them to enter GST/VAT taxes for each item in their expense report.
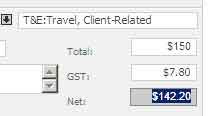
BigTime's GST/VAT format's allow a user to specify a "total amount" (from their receipt) as well as the "GST/VAT Amount." The system will then automatically calculate the net. With this format, users aren't locked into a fixed calculation for GST or for VAT, and individual users don't need any accounting knowledge to enter their receipts. They just need to be able to locate the GST/VAT line item on the receipts they are entering into the system.
This entry format also works well for receipts that include amounts that are only partially taxed (e.g. - meals that include a tip). Just enter the total bill ($150.00 in the example above) and the GST from the receipt ($7.80 in the example). BigTime doesn't care how much of the remaining amount is PST taxable, for example, or how much of it was a "tip."
Firms that will be using BigTime to enter expenses in several different currencies will need to use one of BigTime's multi-currency data entry forms. Those forms allow a user to record expenses in any of the currencies you've added to the system. Exchange rates are pulled from QuickBooks, and they are applied at the time the user enters their expense.
You'll also need to make sure that your company is setup to use BigTime's multi-currency features before your users will be able to enter expenses on that form.
All expenses are converted back to your firm's home currency, so your totals and the amount(s) to be reimbursed are in a single currency.