Spreadsheet Formats
The spreadsheet format has an edit pane at the top of the page and a detail pane at the bottom. It shows every time entry you've created (along with hours, notes, etc.) and can be sorted/grouped by project, category, item, etc. It's a great view to use if you'd like to be able to see all of your timesheet notes at a glance and aren't as concerned about how the timesheet fits together for the overall week or month. Most of the spreadsheet formats will look similar to the one shown below, and typically differ only in (a) the fields that are shown in the edit pane and (b) the columns that appear in the detail pane.
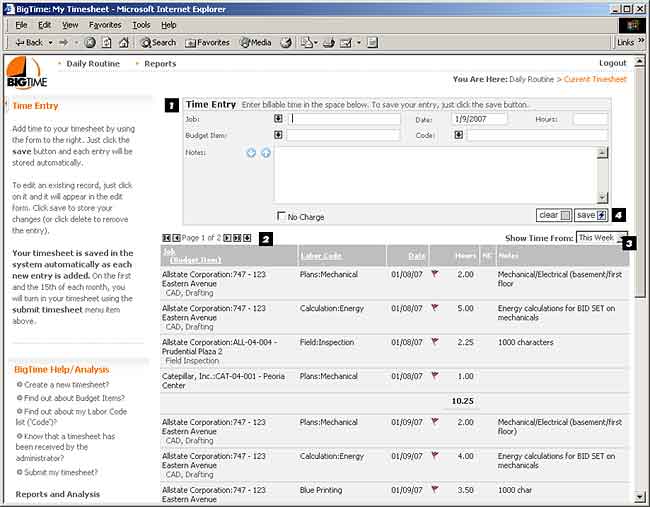
- The Edit Pane allows you to add new or edit existing time entry records. To edit a time entry record, you can just click on its row in the detail pane and it will pop up in the edit pane where you can make changes to the entry.
- The Detail Pane shows you all of the hourly data you've entered so far (only un-submitted time is shown here), and the columns that appear depend on the specific spreadsheet view you've chosen. Click on one of the column headings to sort/group the data by project, labor code, etc. Also note that you may have several pages of timesheet data, so you can flip from page to page using the navigation buttons at the top left-hand corner of this pane.
- Filter the Details by Week/Day/etc. using the "show time from" pick list. This will tell the system to show you only time for a specific week, day, etc.
- The Save button appears only on the edit pane, since there's no other place you can edit timesheet data in this view.