If you are using a Canadian data entry format for your expenses, then your users can enter the GST amounts on each of their expense report entries. By default, this calculation works automatically (pulling a GST amount from the user's gross expense). So, a $100.00 expense is assumed to have GST built into it.
Keep in mind, however, that the user can adjust that GST amount. They may, for example, enter a "meal" expense with a tip included. In that situation, they will have paid GST on the meal, but not on the tip. So, the user may adjust the total GST paid on each expense they submit.
BigTime deals with this GST amount differently, depending on (a) what version of QuickBooks you use and (b) your GST posting settings in the QuickBooks Data... Settings area.
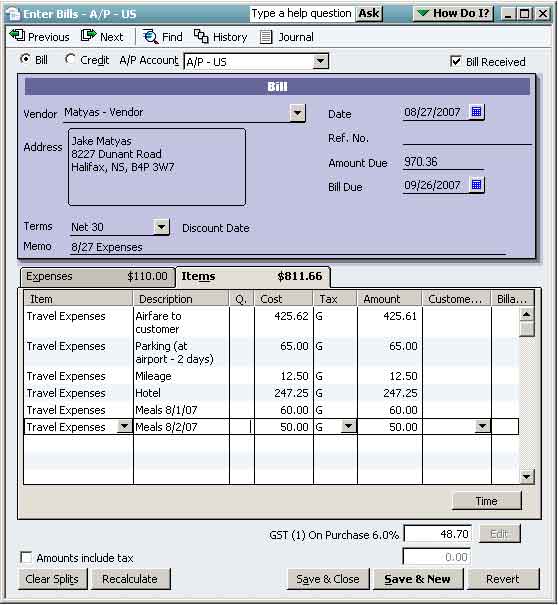
The earlier versions of QuickBooks (2007 or earlier) had a special set of features that allowed BigTime to post each employee's expense report so that it would show up in QuickBooks as a bill similar to the following example.

On this bill, each line item is attached to a specific tax code. In addition, the Total Tax paid is shown at the bottom of the screen. When BigTime posts a bill to these earlier versions of QuickBooks, the transaction has some specific characteristics:
Starting with the 2008 edition of QuickBooks, applications like BigTime can no longer adjust the "total tax" numbers at the bottom of each bill we post. So, BigTime has adjusted the way we post employee expense reports to compensate for that limitation.
Now, Canadian customers can choose two different posting styles, depending on their specific requirements. You can find both posting format options in the Tools... QuickBooks Data... Settings... General Settings page (in the section labeled "Employee Expense Report (Post) Settings") toward the bottom that page.
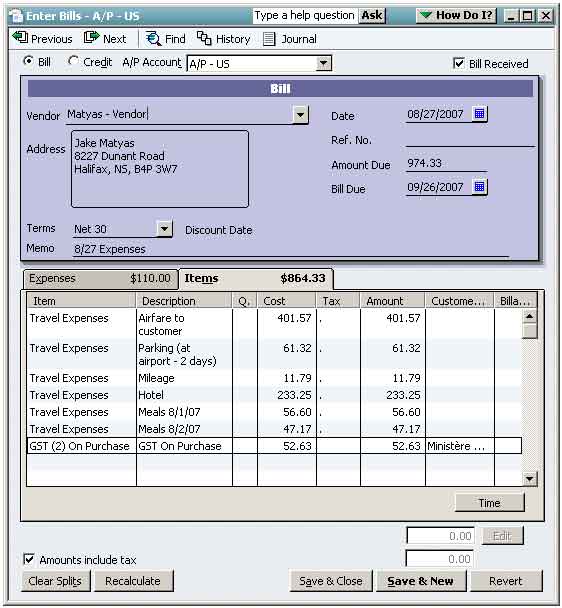
By default, when BigTime creates a bill from an employee's expense report and posts it to QuickBooks, the system breaks out any GST charges as a separate line item. This default posting style results in a bill that looks like this one shown here.

In order to use this format, you need to have a GST "sales tax item" that BigTime can use to create the "GST Payable" line item on each employee expense report. You can pick the item you'd like to use from the QuickBooks settings page (in your Tools menu), in the Employee Expense Reports section of that page. Note that you'll only be able to select items that have been setup properly in QuickBooks (see below).
Chances are, you already have a sales tax item that we can use when we post expense reports. If you don't, then the system will tell you that it can't find any items when you try to select one from the settings page. In that case, you'll need to create a new sales tax item in QuickBooks for GST tax amounts.

Your new item will need to be setup properly, and you can do that by following the instructions shown here.
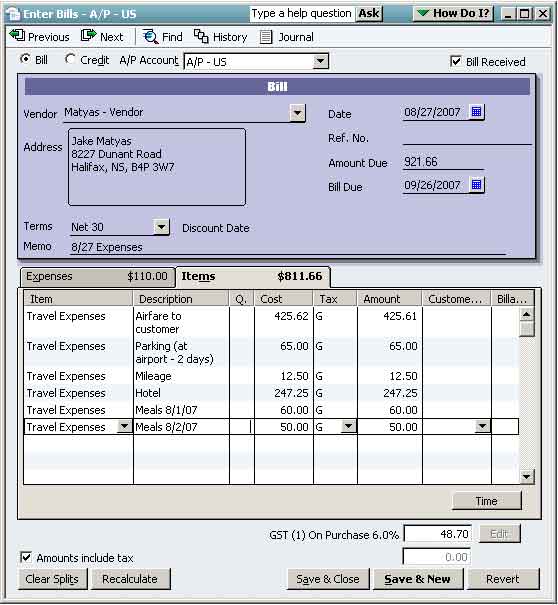
For many firms, users rarely adjust the GST amounts paid in their expense reports, and accounting would rather see each individual line item on an expense report linked to a specific tax rate (for reporting detail). For these firms, BigTime provides an alternate posting format that allows you to let QuickBooks handle tax calculations automatically.
To use that format, you would need to change your expense posting settings (in the QuickBooks Settings area of the Tools menu). Set the GST Posting Style to "Let QuickBooks Calculate GST Automatically." When you do, expense reports posted to QuickBooks will look like the one shown here.
